Get your documents signed with legal validity in a few clicks!
1. Once inside your account, tap the blue "Create document" button at the top of the screen and select the document to be signed. Proceed by clicking "continue."
2. In step 2 of the process, fill in the name of the person who will sign, and if there is more than one person, click "+Signer."
If desired, turn on the "advanced authentication" button to complete with e-mail and phone number of the involved parties.
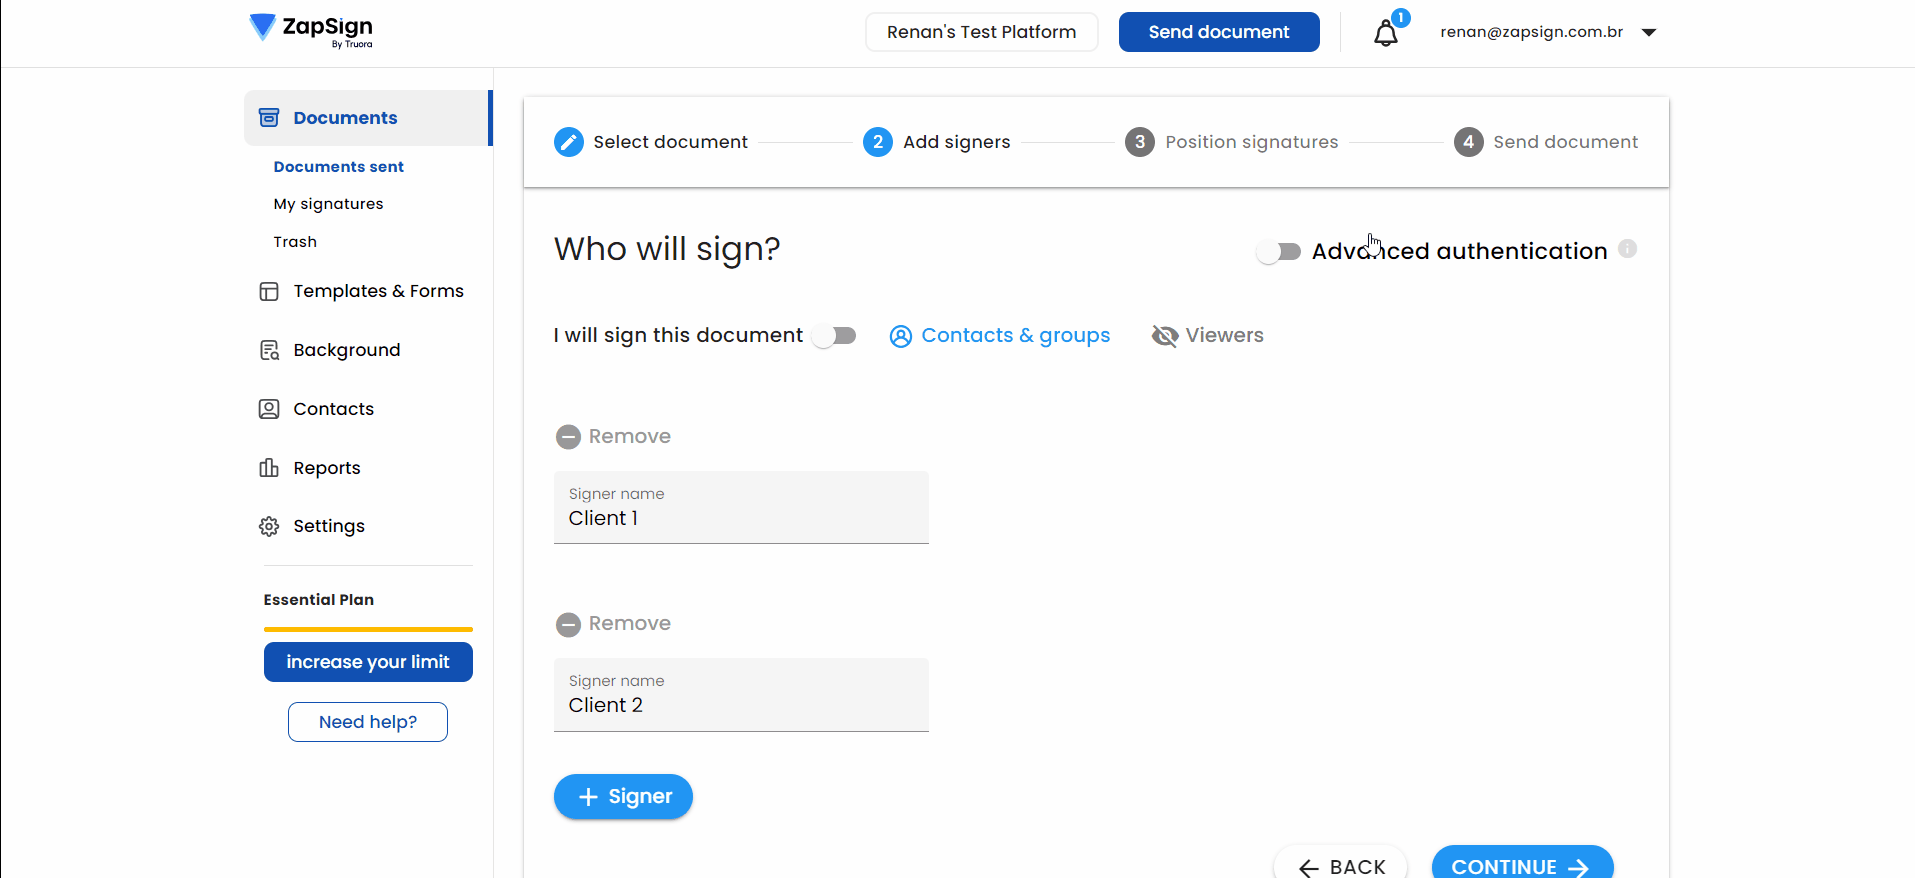
You can also choose which authentications will be applied to them at the time of signing, such as selfie, ID photo and SMS code, for example. All forms of authentication have the same legal value; choose the ones that you and your signer feel most comfortable with.
3. Click "Continue."
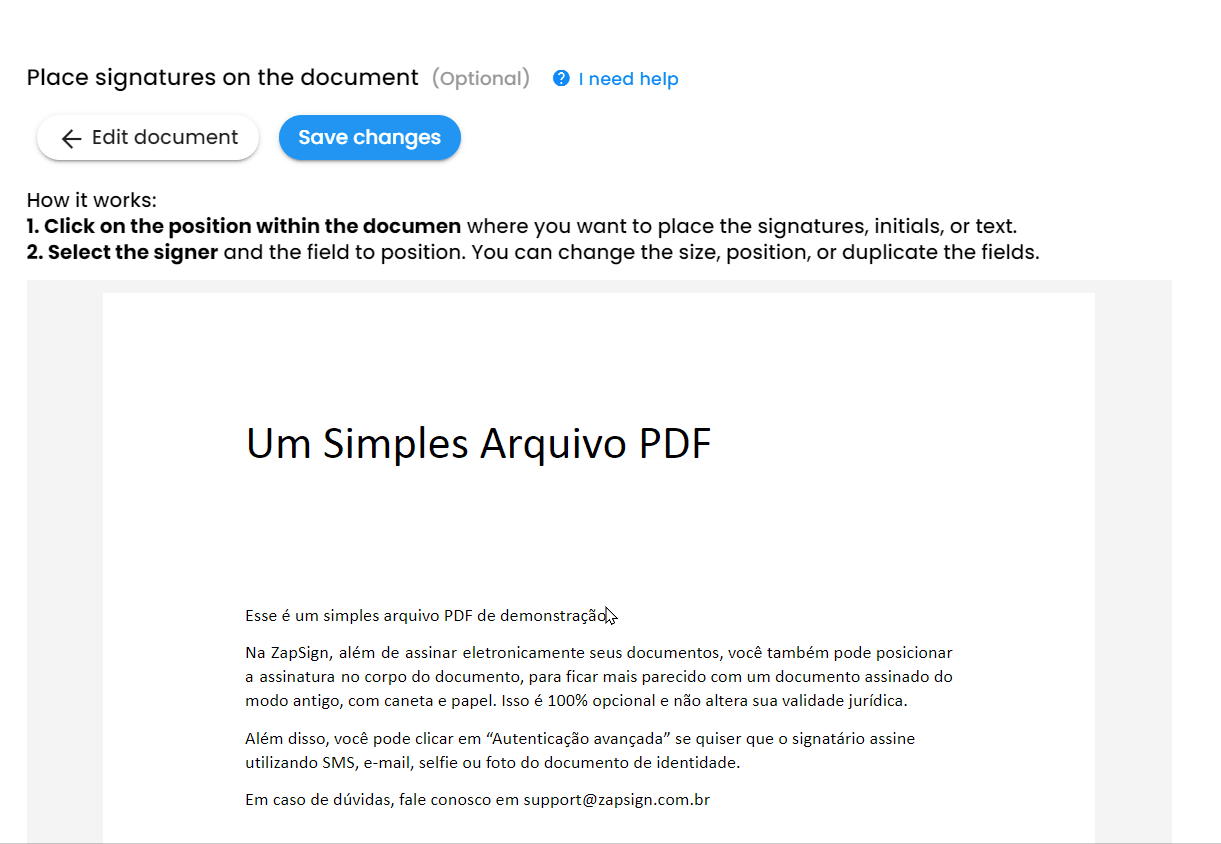
4. In step 3 of the process, click on the areas of the document where you want to place the signatures of each signer (if necessary), and tap "save."
There you go! Now you have a link that you can share with the person you want to collect the signature from:
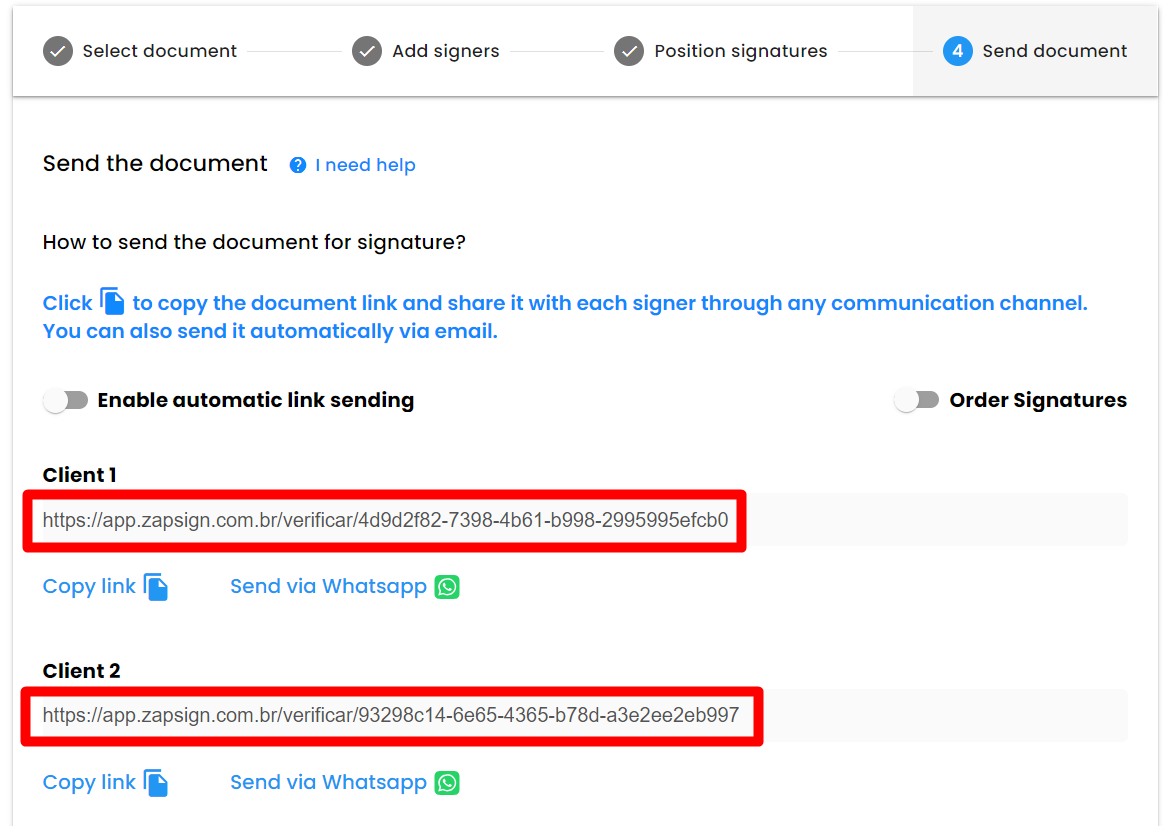
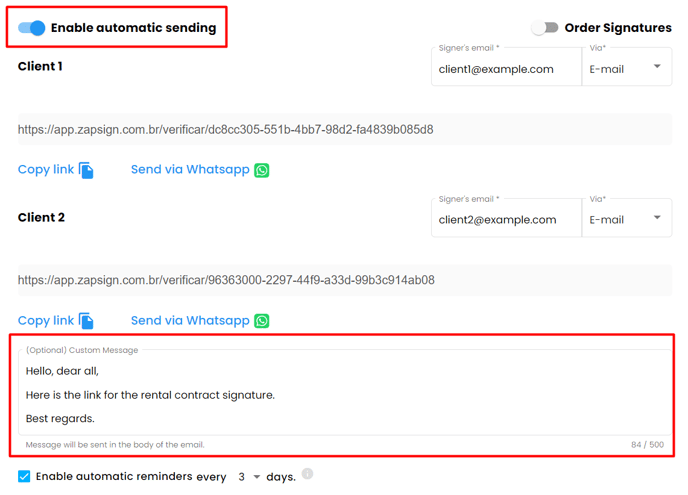
If you find it more convenient, ZapSign can send the document for you. Just check the "enable automatic sending of links" button before finalizing.
Take the opportunity to insert a message that will be sent in the body of the email and define other settings such as the order of signatures and the signing deadline:
Don't worry! We will notify you by email every time someone signs the document.
Also, please note that the signers do not need to have a ZapSign account; they just need to click on the signing link sent by you, okay? 😉